
 Occasionally I teach a class on basic photography. Whenever I teach this class, I always start out with how the camera sees light and I use this photo as an example. These two photos were taken within seconds of each other and within 5 feet of each other. This beautiful woman was taking a class from me and I snapped these two photos off to show how light makes a difference in photography. She was stunned with the results. This photo has been one of the best learning tools that I have used. The picture on the left is direct overhead, middle-of-the-day sunlight. The shadows are harsh and for people, this light is not very flattering. For the right hand photo, I moved her about 5 feet until she was under the open shade of a large tree with the same sunlight reflecting off the ground and bouncing onto her face. You can see that reflected light in her eyes. The light on her face is soft and without harsh shadows.
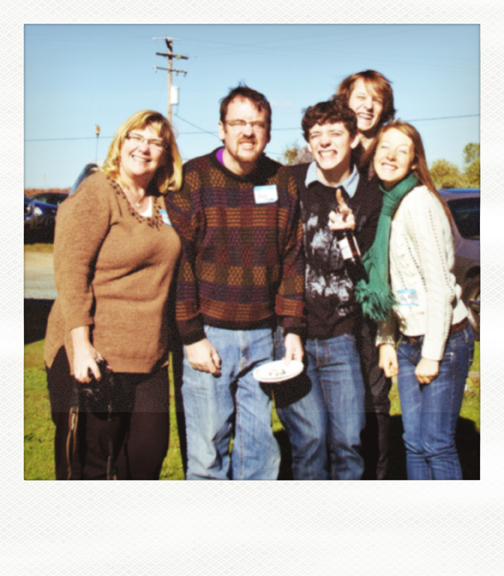
I remember when I was growing up my mom would always place us in direct sunlight with her back to the sun when she would take our picture. And, she would always make us take off our sunglasses so she could “see our eyes.” With that light, our eyes were black squinty holes. The picture would have been better with the sunglasses. We have many pictures of me and my brother and/or our little friends on the beach, squinting into the sun. Cute, but not attractive. Here’s a photo I took a few years ago of some of my family members. They all decided that they would reenact those squinty-eyed, terribly lit, bad background photos. A bunch of jokesters.
Our eyes make many adjustments to how we see things. Our eyes are incredible organs and have a range of light that cannot be matched with a camera. We also see with our emotions, which add to the beauty of what we see. We also have the ability to “not see” unwanted objects in the scene that we are photographing (ie. toys strewn around the room, unwashed dishes in the background, trees growing out of heads, etc.) We only notice the unwanted distractions when we look at the picture and someone says, “Hey! Look at that little person coming out of his pocket.”

Cameras don’t have the ability to see the way our eyes see. We have all stopped along the road to take a picture of a beautiful scene. When we get home and look at the photo, we are likely to say something like, “Gosh! This beach/vineyard/lake…was much more beautiful when I saw it than it is in this picture.” And then we never look at the picture again because it didn’t depict what we saw when we were there.
Case in point: restaurant food photography.
THESE.PHOTOS.ARE.JUST.EMBARRASSING!
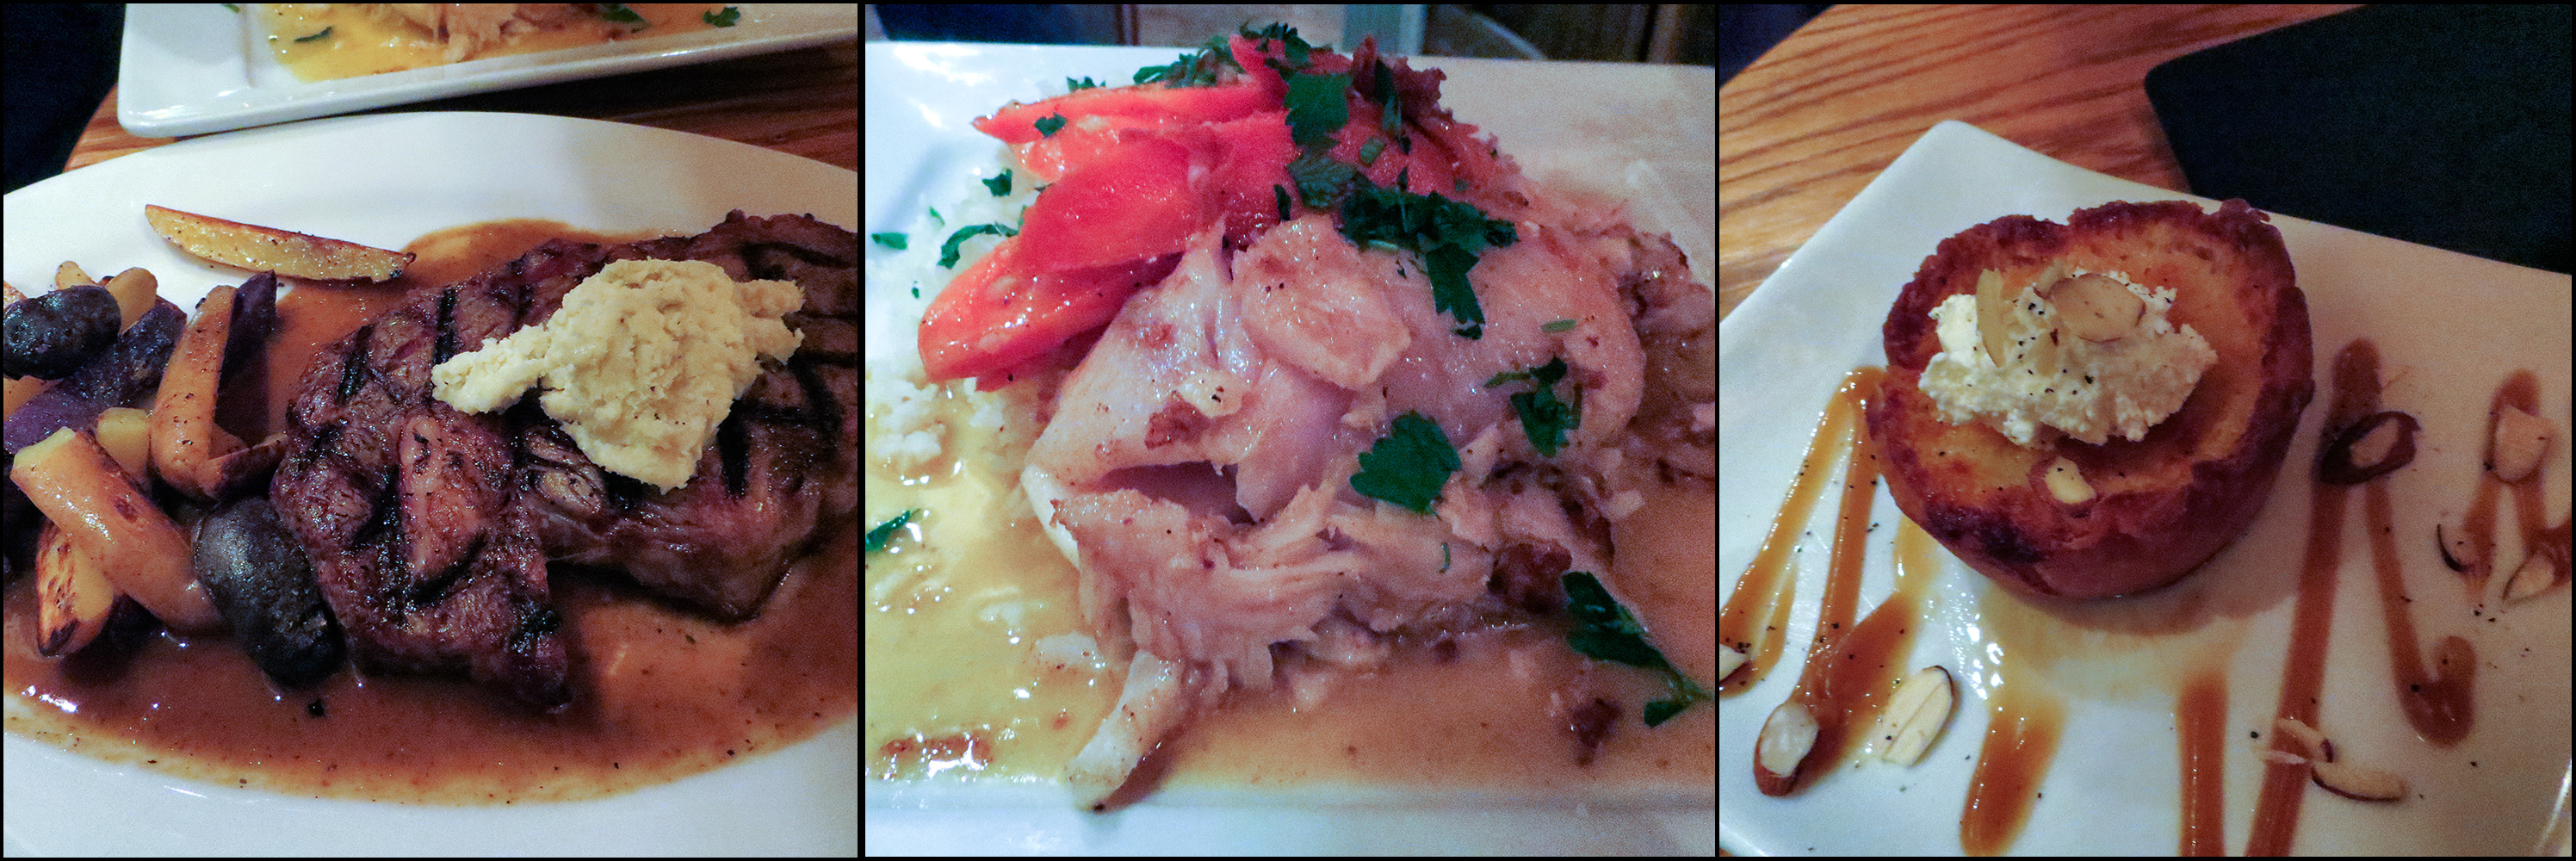
This was taken at a local restaurant (who’s name shall remain a mystery to protect their good reputation from my horrible pictures.) This was a lovely meal that Yes!Chef! and I both enjoyed. I had a great steak with herb butter and roasted fingerling potatoes. Yes!Chef! had seafood stuffed halibut with a Ginger Sauce and Rice. We shared a lovely tart. The food tasted great. The only light available was overhead lighting and the flash on my camera (which I did not use because it would have disturbed the other diners.) These pictures do not in any way do the food justice. The color is odd. There are bizarre shadows from the overhanging light and the photos are blurry because of the low light and camera shake. The question is: How could I have improved these photos? I was able to remove some of the yellowish cast caused by the tungsten lighting post processing, but there wasn’t much else I could do short of bringing in an off camera light or taking the food outside, which would have ruined the experience and disturbed the other patrons. There were no windows in this restaurant, but if there were, I could have photographed the food next to the window. Window light is highly desireable for better food photography.
Another case in point: kitchen overhead light photography vs. window light

Please note that I did not enhance these photos post process. This is how they looked straight out of the camera. The overhead kitchen light is tungsten lighting which adds a yellowish cast to everything. It also adds little specks of yellowish brightness on the plate and on the fruit. So, when you use kitchen light, remember that the food will take on this yellowish cast. Hand-holding your camera in low-light situations will create some blur from camera shake. Blur comes from any low-light situation, not just yellowish, yukky kitchen lighting. I use a tripod on most of my shots unless I’m using an off-camera bounced flash while I’m in the kitchen with Y!C! The flash causes the action to stop (in most cases) and so there is rarely a problem with blur. This is not always the best light for food, but it is better than dealing with overhead kitchen lights or on-camera flash.
In the above example, the window light has the most accurate color. This is why many food photographers use window light. Also, the shadows are softer, and you can get a real feel of the texture and shape of the food. You should also be aware of the type of window or natural light. Direct sunlight can be harsh (see photos at top of page.) Even if you are photographing your food inside next to a large and beautiful window, if the sun is coming in directly, it may give you results that are undesirable. Not all direct sunlight is bad (even for people photography. I love to shoot people outside when the sun is coming up or going down, or when the light is coming behind them.)
Direct sunlight can be a great way to show texture on food. (Orange texture with Direct Sun: rear). However, it can also wash out the texture and add bright spots on the subject. Check out the comparisons below between direct sunlight from a window and moving the fruit a few inches out of the direct sun causing the light to be diffused.


The white plate also acts as a reflector of the light softening the shadows further and lighting up the shadow-side of the fruit. It is especially noticeable on the “Diffused light: rear”. See how the bottom half of the apple is reflected and the top half is not, causing the apple to look a little weird. I usually use a white foam core board to reflect the light on the shadow side of my food, which opens up the shadows. (If I had used that board with the shot of the apple that is half reflected by the white plate, the entire side would have been reflected instead of just half. In other words, it would have looked more evenly reflected.)
Direct sunlight can also show the transparent nature of some foods:
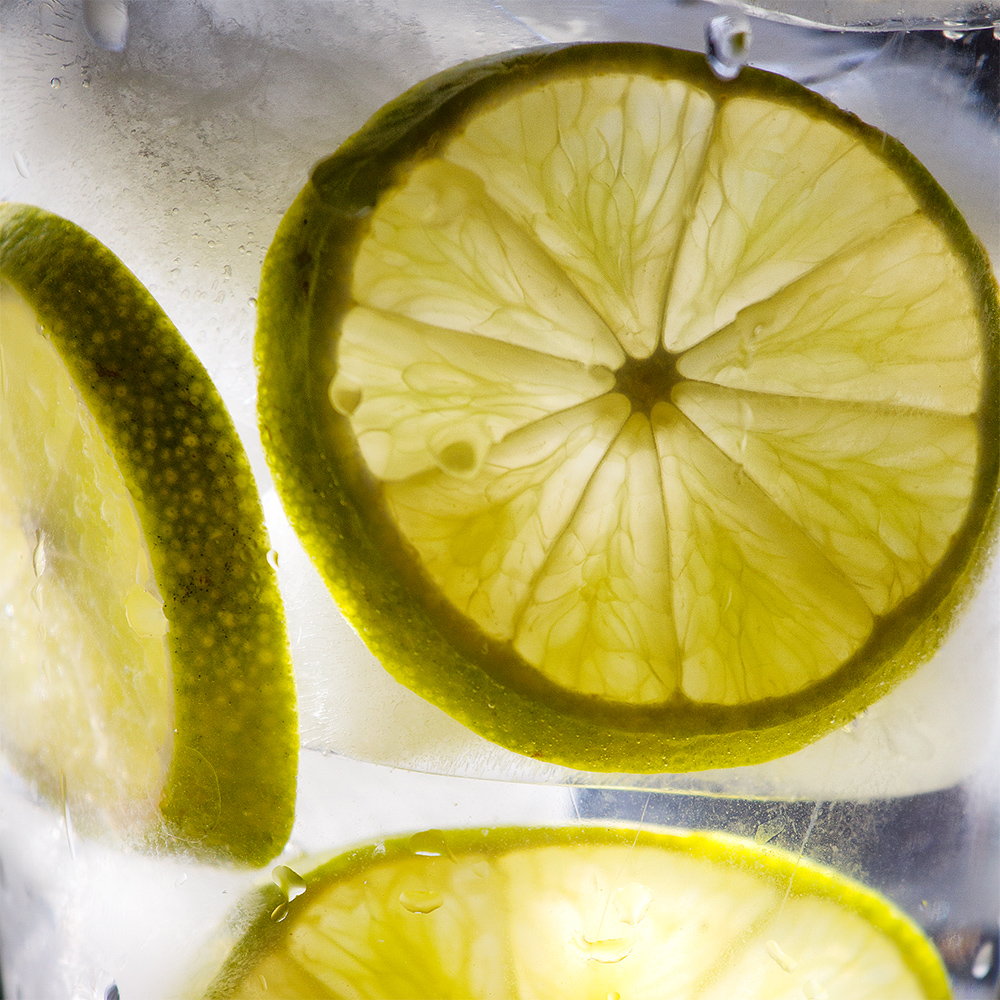
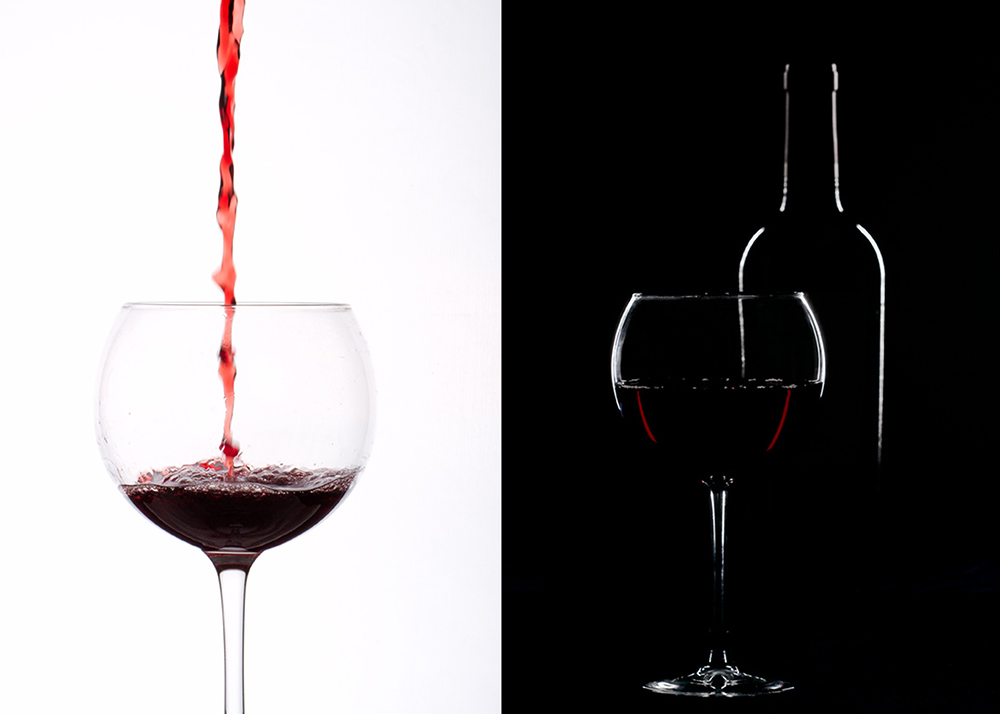
Back light is very useful in food photography and is a wonderful technique to master. Below, I used a strobe with a softbox directly behind the wine. On the right-hand side I blocked most of the light with a black foam-core board so only the sides would be lit. No other light was used in either photo.
I find that food photography is one of the most difficult types of photography that I have ever done. I continue to take classes, buy food photography books and prowl around the web looking to improve my food photography. These tips are just a few things that I have learned along the way that I hope will help you, too. Many, many people have helped me with my photography, so I would just like to return the favor.
DISCLAIMER: I am not an expert food photographer. I am a learner.
As I learn more and more about this very difficult but rewarding type of photography, I’ll pass it along to anyone who wants to read about it.
Feel free to ask questions or add comments.

Well done! Thanks for sharing the experience! I like it!
Thank you for your kind words and for stopping by.
Karen, these were amazing examples; they made me realize how little I know about photography in general and food photography in particular. If you’e giving another round of lessons in the summer, I would certainly like to be part of them—whether they’re outdoor shoots (and, again, yours are beyond breathtaking!) or “wondrous” apples and oranges and wine bottles with strobes and soft boxes. Would love to hear from you.
I am planning on giving a little seminar on food photography this summer. Yes!Chef! said he would cook for us (and then we can eat the food). So, if you are interested, I will keep you posted. It will either be in the Placerville area or South Lake Tahoe.
This was such an educational post for me, especially because I’m slowly learning how to take photographs. I guess lighting is key!
Yes, in any type of photography, lighting is always the key. I’m glad you found this post useful.
Terrific examples Karen. Thanks for the mini lesson.
If you go to my photoblog you can see the examples of my attempt at photographing my food. You are so right about kitchen overhead light.
I saw your post with the pork chops. Nicely done. Overhead light is problematic in any kind of photography, but especially with food or product photography. I’m still learning…
Nice wright up! I will be taking your food photography class when you have it.
You are already signed up by me.
Love your informative post and all the example shots 🙂
Why, thank you! Sometimes its a little embarrassing to show my bad shots, but it’s useful in teaching what not to do.
Thank you for the lovely tips! I must get better with my photography skills. Perhaps, I can use these lighting tips to create better images!
I hope you find some of these tips helpful. I’m still learning…
The tips are great! But is there any way to make artificial light work when taking food photos. Sometimes the sun just isn’t out.
Cloudy days still work with window light, although you might have to increase your ISO or slow down your shutter speed. When the sun goes down, you will have to resort to either flash/strobe or continuous lights. I recently purchased a great artificial table top light that works pretty slick for food. http://www.amazon.com/gp/product/B0009K50RO/ref=oh_details_o02_s00_i01?ie=UTF8&psc=1
This was such a helpful post. Thank you! I am definitely a “learner” in making all the necessary settings, natural and functional, to optimize my photos, and some of your lighting tips are essential. I still have a long way to go. But any time I photograph food I fall closely into the same category as the restaurant examples! I pinned your post to my “beyond point and shoot” Pinterest board and hope to refer to it often, as well as share it. Super!
That made me laugh about the restaurant examples. As I mentioned, food photography is hard because there are so many distracting elements and the goal is to make mouths water and want to eat/make the food shown. If you are looking to improve your food pics, take a plate of food and put it in different lighting circumstances…kitchen, window, outdoor, diffused, direct light, flash. You will see very quickly what looks best to you. Then stick with that light and work on improving your shots in the light you like best. Thank you for sharing my post.
[…] https://callhimyeschef.com/2013/02/21/ive-seen-the-light-another-food-photography-post/ […]
Enjoyed your take on shooting food. Always great to get perspective from others. I am the art director on all of Chili’s food photography, and we exclusively use natural light for all of the reasons you state. There is something about the way the light wraps around the food and the softness of the contouring and shadows that studio light can’t replicate. Almost all of our work is lit from behind and to one side or the other. We generally fill the shadow sides a bit, but we have moved toward as minimal as possible approach, both in lighting and retouching. The photographer I partner with on this (Guillaume Garrigue / Agent 485 in Dallas) designed his studio with a bank of floor-to-ceiling windows that runs the entire length of the space specifically for natural light food shooting. A few years ago we also started to shoot HD similarly, although with some media-necessary modifications. It’s pretty interesting to see how we have evolved over the years in our styles and tastes, and the convention shifts in the industry. Best of luck and many thanks for your thoughts on photography.
That studio sounds amazing. Window light is definitely my favorite, although I do occasionally use daylight balanced continuous lighting when the need arises. Thank you for stopping by and your kind words.
[…] Sursa imaginilor: http://www.archdaily.com/256181/mecenat-art-museum-naf-architect-design-2/ http://callhimyeschef.com…http://www.architectureweek.com/2010/0922/ […]
Hi Karen!
I am a pastor in Virginia and am talking about the power of darkness and light this weekend. I was looking for a portrait contrast to show this and discovered your photos. They are perfect! Would you consider giving us permission to use your photos one time in a presentation this Sunday for about 120 people? Thanks for your consideration! We would be glad to compensate you for this.
Pastor Poff:
Thank you for asking. I’m assuming you are speaking about the young woman at the top of the page. I would be happy to send it to you. Please send me your email address to sierraspringsphotography@comcast.net. What size are you seeking? It looks like I have one that is 1000x300px at 300 ppi. And one that is 10×8″ but it is 72ppi. Let me know.
Karen
This was a lovely blog postt
Love this post! The tips on lighting and composition are so practical and insightful. It’s great to see such a clear breakdown of food photography techniques. Thank you for sharing your expertise.